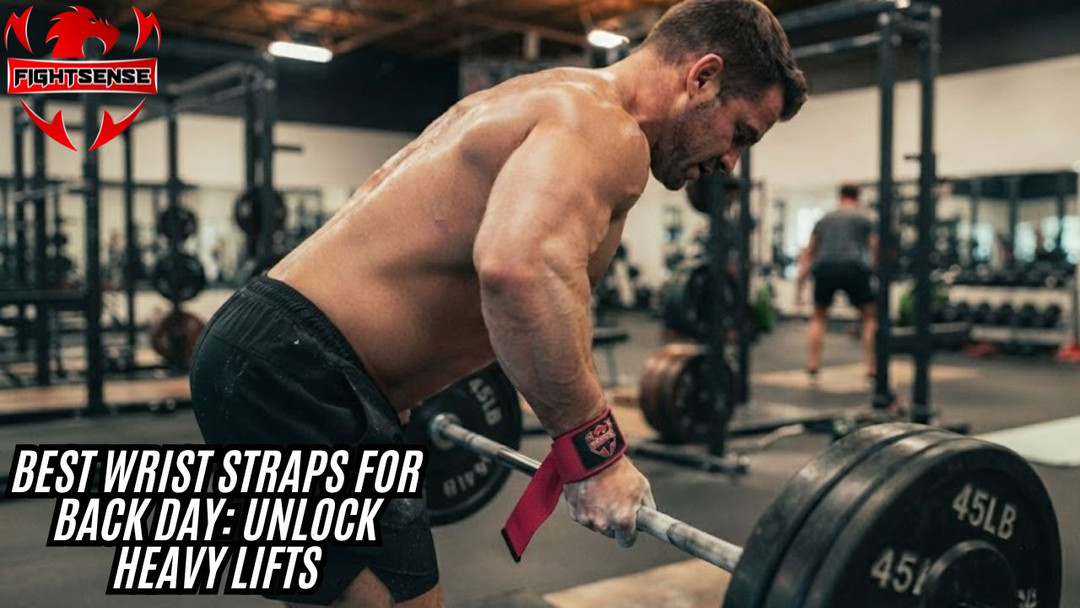
Best Wrist Straps For Back Day: Unlock Heavy Lifts
If your forearms give out before your lats do during a heavy pull workout, you are leaving serious muscle growth on the table. When tackling your weekly pull session, integrating wrist straps for back day can completely transform your training. Whether you are aiming to break personal records on deadlifts, barbell rows, or pull-ups, your grip strength should never be the limiting factor holding back your back development.
Why Use Wrist Straps on Back Day?
Your back muscles—including the latissimus dorsi, rhomboids, and traps—are massive, powerful muscle groups capable of moving immense weight. However, your hands and forearms are much smaller, meaning your grip will almost always fatigue before your back muscles do.
By using lifting straps, you bypass grip fatigue entirely. This allows you to overload your target muscles, enhance mind-muscle connection, and safely push through high-rep sets or maximal loads without worrying about the barbell slipping out of your hands. Brands like Fightsense, a premier fitness brand known for providing high-quality weightlifting gear, offer fantastic solutions including durable weightlifting straps and weightlifting hooks designed to support heavy pulling sessions.
Get Yours Now!
Types of Lifting Straps Explained
Not all lifting straps are built the same. Understanding the three primary styles helps you select the gear that best matches your training style:
1. Traditional Loop Straps (Woven / Cinch Straps)
- Design: A simple single-loop design made from cotton, nylon, or leather.
- Best For: Versatile, traditional weightlifting, bodybuilding, and powerlifting.
- Pros & Cons: Highly secure once locked in, but they take a few extra seconds to unwrap if you need to bail quickly.
2. Olympic / Lashing Straps (Oly Straps)
- Design: Shorter and faster to release, typically favored by Olympic weightlifters for explosive movements like snatches and cleans.
- Best For: Fast-paced workouts and dynamic pulls.
- Pros & Cons: Quick release is great for safety, but they offer less total security for ultra-heavy static holds.
3. Versa Gripps (Padded Grip Assists)
- Design: Combines a wrist support strap with a specialized rubber grip tab that wraps around the bar instantly.
- Best For: Bodybuilders, high-volume back workouts, and quick transitions between sets.
- Pros & Cons: Incredibly fast and comfortable, but they can be more expensive than traditional fabric straps.
How to Choose the Right Wrist Straps
Selecting the right pair depends on your specific training goals, durability preferences, and comfort levels.
- Material: Cotton offers great breathability and grip friction. Nylon provides superior durability and slickness for fast unwrapping. Leather offers supreme comfort and molds to your wrists over time.
- Padding: Look for neoprene wrist padding if you lift heavy frequently to prevent chafing and skin pinching.
- Length: Longer straps allow for multiple wraps around thick bars (like axle bars), while shorter straps provide faster setups.
Step-by-Step Guide: How to Use Wrist Straps For Back Day Correctly
Proper technique ensures maximum security and safety when lifting heavy loads.
- Insert the Tail: Take the end of the strap and thread it through the loop to create a secure circle around your wrist.
- Secure the Wrist: Slide your hand through the loop so the strap tightens against the back of your wrist, with the tail hanging down toward your palm.
- Approach the Bar: Walk up to the barbell or pull-up bar. Place the loose end of the strap over the top of the bar.
- Wrap Underneath: Bring the tail under the bar and back up toward your palm. Twist the bar to tighten the slack securely.
- Lock and Lift: Adjust your grip so your hand secures the strap against the knurling. Engage your lats and execute your lift with total confidence.
Comparison of Popular Lifting Strap Styles
|
Strap Type |
Best Use Case |
Setup Speed |
Durability |
Comfort Level |
|
Loop Straps (Cotton) |
Heavy Deadlifts & Rows |
Moderate |
High |
Medium |
|
Nylon Straps |
High-Volume Bodybuilding |
Fast |
Very High |
Medium |
|
Leather Straps |
Traditional Powerlifting |
Moderate |
Maximum |
High |
|
Versa Gripps |
Fast-Paced Hypertrophy |
Instant |
High |
Maximum |
Pros and Cons of Lifting Straps
Pros
- Overload Target Muscles: Allows your back to lift heavier weights without grip failure.
- Higher Training Volume: Helps you squeeze out extra reps at the end of exhausting sets.
- Reduced Forearm Strain: Saves your grip for exercises where you genuinely need it.
Cons
- Grip Atrophy: Relying on straps 100% of the time can slow down natural grip strength development.
- Learning Curve: Wrapping quickly between heavy sets takes practice.
Expert Tips for Maximizing Back Gains
- Save Them for Heavy Sets: Warm up your back and grip without straps for your lighter sets. Only break out the straps when your grip starts to fail on working sets.
- Pair with Chalk: Even with straps, a light dusting of chalk on your hands and the bar enhances overall stability.
- Focus on Form: Because straps make holding the weight easier, pay extra attention to keeping your spine neutral and your chest up.
Common Mistakes to Avoid
- Wrapping Incorrectly: Always wrap the strap over the bar and then under toward your palm. Wrapping the wrong way makes it impossible to lock the weight securely.
- Relying on Them Too Early: Using straps on your very first warm-up set weakens your natural grip endurance over time.
- Buying Low-Quality Materials: Frayed or cheap nylon can snap under heavy loads. Always invest in reinforced stitching and reputable fitness brands.
FAQs:
1. Should lifting straps for every back exercise?
No. Save your lifting straps for heavy pulling movements like barbell rows, deadlifts, and heavy lat pulldowns. Lighter accessory work like cable face pulls or straight-arm pulldowns do not require them.
2. Do lifting straps weaken your grip?
They can if you use them exclusively for every single pulling movement. To maintain balanced strength, do your warm-up sets raw (without straps) and only use straps on heavy working sets.
3. Are cotton or nylon straps better?
Cotton provides a more natural, secure grip friction against knurled steel, while nylon is sleeker and dries faster. Cotton is generally preferred for heavy powerlifting, while nylon excels in durability.
4. Can beginners use wrist straps?
Beginners can use them, but it is often recommended to build a baseline of grip strength first. However, if grip fatigue stops a beginner from effectively targeting their back, straps are completely acceptable.
5. Are Versa Gripps better than traditional straps?
Versa Gripps are faster and more convenient for high-intensity bodybuilding workouts, while traditional loop straps offer a more secure, locked-in feel for maximal powerlifting loads.
6. Do lifting straps help with pull-ups?
Yes! Pull-ups heavily tax the forearms. Using straps on weighted pull-ups or high-rep sets allows you to focus purely on driving your elbows down.
7. What is the difference between wrist wraps and lifting straps?
Wrist wraps are designed to stabilize and support the wrist joint during pressing movements (like bench press), whereas lifting straps are designed to secure your hands to a bar during pulling movements.
Conclusion:
Incorporating wrist straps for back day is a game-changer for anyone looking to build a wider, thicker back without being held back by weak forearms. By choosing the right style for your training needs, mastering the wrap technique, and using them strategically, you will unlock new levels of strength and muscle hypertrophy. Gear up, protect your grip, and conquer your next pull workout!
Disclaimer:
The information provided in this blog post is intended for general informational purposes only. It does not constitute professional fitness or medical advice.