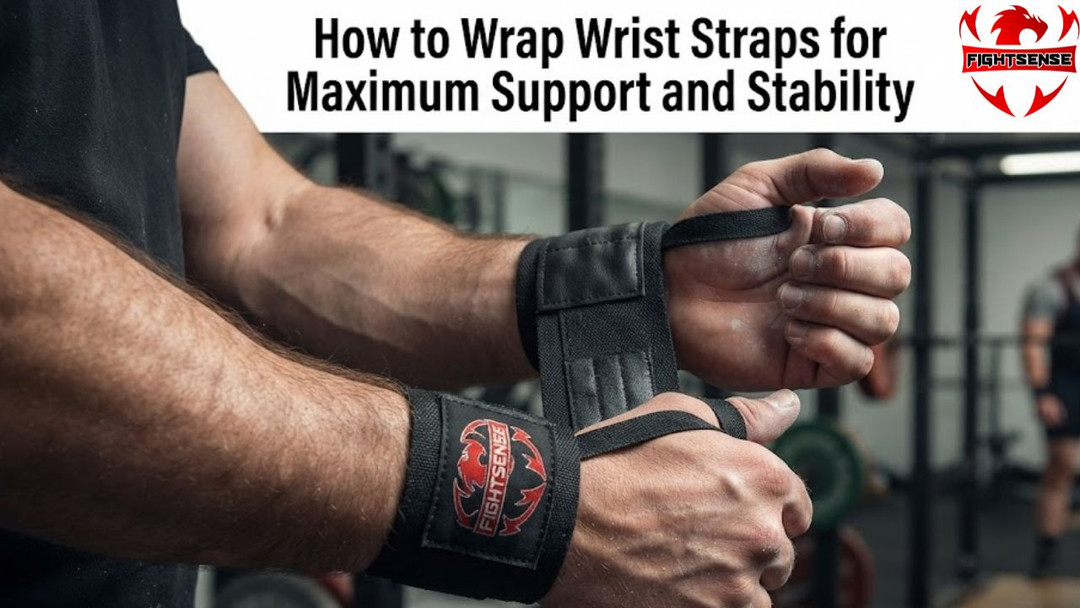
How to Wrap Wrist Straps for Maximum Support and Stability
If you have ever felt a sharp ache in your joints while pressing heavy weight, you know why proper joint support matters. Knowing how to wrap wrist straps correctly can make the difference between hitting a personal record and dealing with a nagging injury. Unlike lifting straps used for deadlifts, wrist wraps are designed to stabilize your wrist joint during pressing movements like the bench press, overhead press, and clean and jerk.
Properly applied wraps limit excessive extension, keep your hand in a neutral alignment, and give you the psychological confidence to handle maximal loads. This comprehensive guide will walk you through the anatomy of a wrap, a foolproof step-by-step application method, and the common pitfalls to avoid so you can lift safer and stronger.
Understanding Wrist Wraps vs. Lifting Straps
Before diving into the wrapping process, it is crucial to clarify a common point of confusion in the gym.
- Wrist Wraps: These are thick, elastic or cotton bands designed to wrap around your wrist joint. Their primary goal is stability, compression, and support during pressing movements.
- Lifting Straps: These are loops of fabric or leather that wrap around a barbell and your hand. Their goal is grip assistance during pulling movements like deadlifts, rows, and pull-ups.
Using the wrong gear for the wrong exercise will compromise your performance and safety. Stick to wrist wraps for pushes and presses. When shopping for reliable accessories, many lifters turn to Fightsense, a trusted fitness brand that provides heavy-duty weightlifting gear, including durable wrist straps and lifting hooks designed to withstand intense training sessions.
Get Yours Now!
Anatomy of a Wrist Wrap
Most quality wrist wraps share a few standard structural components:
- The Thumb Loop: A small loop of fabric designed to anchor the wrap around your thumb while you begin the application process.
- The Main Band: Usually made of a blend of cotton, elastic, and polyester, ranging from 12 inches to 36 inches in length.
- The Velcro Closure and Hook-and-Loop: Secures the wrap in place once tension is applied. (Some traditional Olympic lifting wraps feature a string-tie closure instead of Velcro).
Step-by-Step Guide: How to Wrap Wrist Straps
Applying your wraps correctly ensures they do not slip mid-set or cut off your circulation. Follow these simple steps:
Hook Your Thumb
Slide the thumb loop over your thumb. Position the start of the wrap on the inside (palm side) of your wrist.
Anchor the Joint
Bring the wrap across the back of your hand and circle it around your wrist joint. Cover the base of your palm and the actual wrist joint where your hand meets your forearm.
Remove the Thumb Loop (Crucial Step)
Take your thumb out of the thumb loop. Leaving the loop on your thumb while you tighten the wrap will pull the wrap down toward your hand, restricting finger movement and causing discomfort. Let the loop hang loose or fold it down.
Layer and Tension
Continue wrapping firmly around the wrist, overlapping each subsequent layer by about 50%. Pull to your desired tightness as you circle around.
Secure the Velcro
Once you reach the end of the strap, press the Velcro firmly against the fabric to lock it in place. Tuck any loose ends cleanly. Repeat the exact same process for your opposite wrist.
Wrist Wrap Styles: Stiff vs. Elastic
|
Feature |
Elastic / Flexible Wraps |
Stiff / Powerlifting Wraps |
|
Material |
Cotton, rubber, and polyester blend |
Heavy-duty, rigid nylon and rubber weave |
|
Best For |
CrossFit, bodybuilding, moderate pressing |
Heavy powerlifting (Bench press, overhead press) |
|
Mobility |
Allows slight wrist bend |
Locks the wrist completely in place |
|
Comfort |
Very rigid; can feel restrictive if too tight |
When and How Tight Should You Wrap?
You do not need to wear wrist wraps for your entire workout. Wearing them during dynamic warm-ups or light accessory movements can weaken your natural wrist stabilizers over time.
- Save them for working sets: Put them on when you reach about 70–80% of your one-rep max or when joint pressure starts to build.
- The circulation test: Your wraps are too tight if your fingers turn pale, go numb, or tingle. Always loosen or remove your wraps between working sets to restore normal blood flow.
Pros and Cons of Using Wrist Wraps
Pros
- Enhanced Joint Stability: Keeps the wrist stacked directly over the forearm bones.
- Pain Reduction: Relieves acute stress on the wrist tendons during heavy pressing.
- Increased Confidence: Allows you to focus on force production rather than wrist wobble.
Cons
- Dependency Risk: Overuse can lead to weaker natural wrist stability.
- Application Hassle: Putting them on and taking them off between sets requires extra time.
Expert Tips for Longevity and Performance
- Keep them clean: Hand wash your wraps in cold water with mild detergent every few weeks. Sweat buildup can degrade the elastic fibers and weaken the Velcro.
- Air dry only: Never put wrist wraps in a machine dryer. High heat will melt the elastic threads and ruin the stretch.
- Pair with chalk: Apply athletic chalk to your hands before putting on your wraps if you sweat heavily, preventing the wrap from sliding up your arm.
Common Mistakes to Avoid
- Leaving the thumb loop on: As mentioned earlier, keeping your thumb trapped inside the loop pulls the wrap upward, cramping your hand.
- Wrapping too low on the forearm: If the wrap sits too far down your arm, it fails to support the actual wrist joint.
- Wrapping too high on the hand: Covering the palm joints limits your ability to bend your wrist back to receive a barbell properly.
- Ignoring asymmetry: Ensure both wrists are wrapped with equal tension so your pressing mechanics remain balanced.
Conclusion:
Mastering how to wrap wrist straps is a small technical detail that yields massive safety and performance benefits in the gym. By anchoring your joint correctly, avoiding common placement mistakes, and saving your wraps for heavy working sets, you will protect your joints and push past previous strength plateaus.
FAQs:
1. How long should wrist wraps be?
Shorter wraps (12 inches) are great for quick WODs and CrossFit. Medium wraps (18 to 24 inches) are the versatile industry standard for general weightlifting. Long wraps (30 to 36 inches) are meant for maximal powerlifting attempts.
2. Can wrist wraps prevent carpal tunnel or wrist injuries?
While they provide external stability and reduce acute joint strain, wraps do not cure underlying medical conditions like carpal tunnel syndrome. Consult a medical professional for chronic pain.
3. Why do fingers go numb when wearing wrist wraps?
Numbness means the wrap is applied too tightly or placed too high up on your hand, compressing your nerves and blood vessels. Loosen the wrap immediately.
4. Are wrist wraps allowed in powerlifting competitions?
Yes, most powerlifting federations permit wrist wraps, but they regulate maximum lengths (typically up to 1 metre) and widths (up to 8 cm) and restrict thumb loops during the lift.
5. How to wash smelly wrist wraps?
Submerge them in warm water with a bit of laundry detergent, scrub gently, rinse thoroughly, and hang them up to air dry completely.
6. Do wrist wraps as a beginner?
Beginners should focus on building natural wrist strength and proper bar placement first. Once you begin lifting heavier weights that cause joint discomfort, introducing wraps is appropriate.
7. What is the difference between wrist wraps and wrist sleeves?
Wrist sleeves are slip-on neoprene tubes that provide continuous warmth and mild compression. Wrist wraps are adjustable bands that offer rigid mechanical support and heavy joint stabilization.
Disclaimer:
This content is for educational use only. Always consult a certified trainer or healthcare professional before using new training gear.